You can probably agree there are a lot of light strip options and it can be a bit overwhelming.
We added light strips all over our house and came up with 6 LED light strip ideas to help you find the best ones. We are using highly rated light strips that we purchased on Amazon and light strips we had previously.
Below is a video of what it’s like using these light strips. In this article, we will be going more in-depth on the pros and cons of each light strip.

Table of Contents
LED Light Strip Ideas
Affiliate Disclosure: This page has affiliate links, which earn us commission at no cost to you.
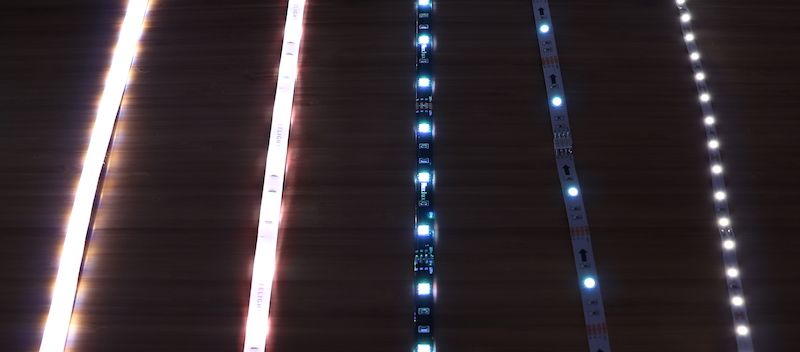
There is a huge variety of light strips on Amazon, in terms of price and quality. For this article, we will be giving more details about the different light strip ideas shown in our video.
We will start with the most affordable, basic strips and end with the higher quality, more expensive options.
Under Kitchen Cabinets
Installing light strips under kitchen cabinets can be slightly tricky, but it looks amazing. Everyone’s kitchen cabinets are going to be different, so there isn’t a one-size-fits-all solution.
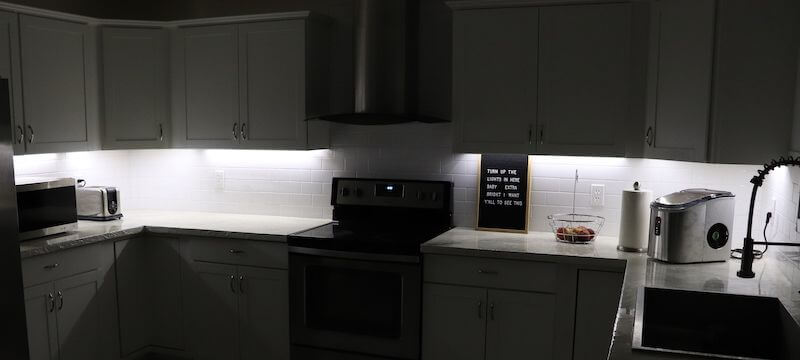
One thing that most kitchen cabinets have in common is that they are separated by a microwave or air vent.
You will probably need a wire and attachments to connect the light strips across big gaps like a microwave. That way you can have one power source to turn the lights on and off.
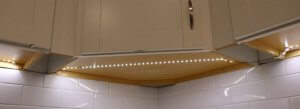
I choose to use the Ustellar white light strips because they are very inexpensive and easy to install under kitchen cabinets. Since I didn’t want to drill holes, I used these light strip connectors to go under the small gaps between the cabinets.
I also used a wire like this to go behind the vent and connect the two sections of the cabinets together.
Ustellar White Light Strips
![]()
![]()
Here are the pros and cons of the Ustellar white light strips.
Pros
- Inexpensive
- Thin. Fits in small gaps for easy installation
- Easy to cut and add connectors
- Can be extended with another light strip to be even longer
Cons
- May flicker sometimes due to a low power supply with many connectors
- When ours flicker, we turn them off and on. Sometimes that resolves the issue
- Only one temperature of white that can’t be changed
- Not the brightest lights, but good for accent lighting
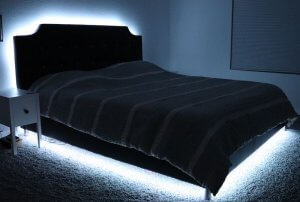
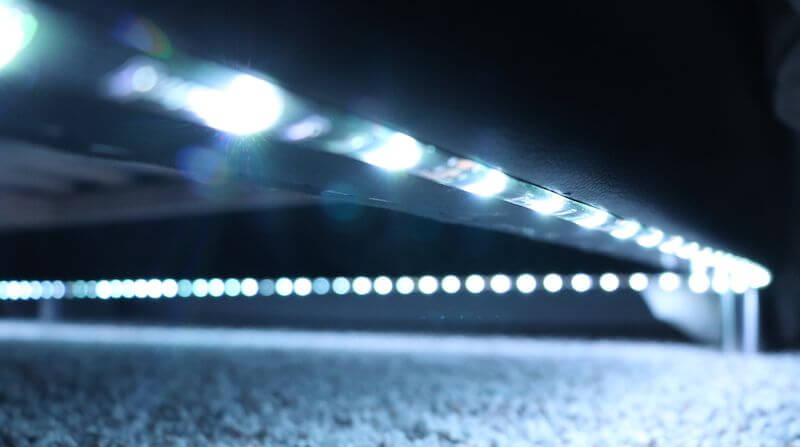
Under the Bed
Adding light strips under the bed seems a bit unnecessary, but it’s one of my favorite LED light strip ideas for the bedroom.
I really hate having an overhead light in my eyes and I’m not a big fan of lamps to clutter the room. So I installed these Nexlux light strips under and around my bed frame.
How did I install it?
This was one of the easiest light strips to install. Simply clean the surface that you are going to install with standard house cleaner and then some rubbing alcohol.
Make sure to do this for all light strips you install anywhere in your home. It may seem like an extra step, but it’s very necessary.
Next, peel off part of the paper covering the adhesive. Stick the light strips to the bottom of the bed and slowly remove the rest of the paper as you attach the strips.
I didn’t cut these light strips even though it’s possible. The 32-foot length was perfect for our king size bed. The whole process took about 5 to 10 minutes.
Seriously, this has to be my favorite bedroom light strip idea.
These light strips can come in IR or RF. I would choose RF because you don’t have to point the remote right at the sensor. You can also get an adapter for these light strips so you can control them from your smartphone.
Nexlux light strips are more advanced than the previous ones we covered, but they still have their drawbacks. Here are a few pros and cons of Nexlux light strips.
Nexlux Multicolor Light Strips
![]()
![]()
Pros
- Very bright and can dim very low
- Multiple control options with IR, RF, and smart phone
- Not too expensive for the brightness and length
Cons
- Remote only gives limited options for whites and colors (more options when connected to a smartphone)
- Can’t automate the lights
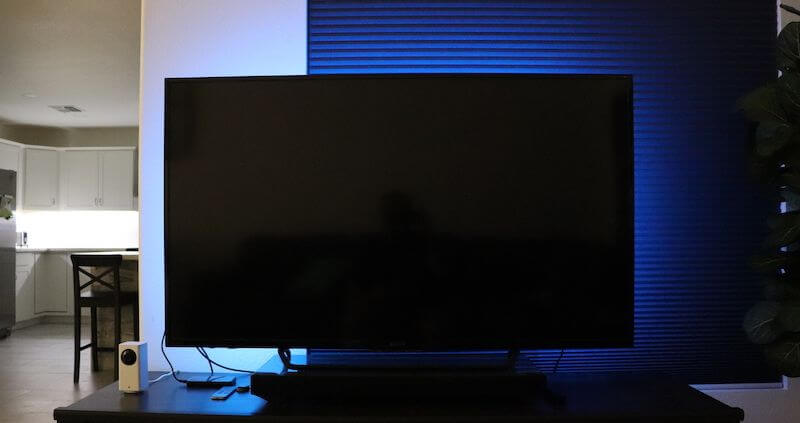
Behind the TV
Light strips belong in you living room.
Not only does adding light strips behind the TV look great, but it can help as a bias light at night. Bias lighting makes the brightness not so harsh on your eyes when it’s really dark. This ensures your eyes won’t dry out due to strain.
Bias lights can also improve the contrast so that darker colors on your screen appear more accurately. It’s part of the reason why movie theaters leave on dim lights near the edges of the theater.
Living room light strips that go behind the TV are very inexpensive and the easiest to install. After I realized how inexpensive and easy it was I kept saying out loud:
Why didn’t I do this earlier!?
It’s seriously one of the best light strip ideas considering the low cost and effort.
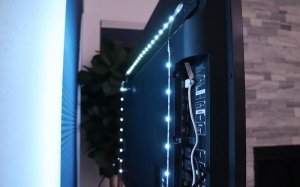
For this, I purchased the Pangton Villa strips on Amazon, which are designed specifically for behind TVs.
The light strips just plug into the TV’s USB port for power and come with an IR remote. Since it uses an IR remote, you can set it up with the Harmony Hub. When you turn on your TV, your light strips will automatically turn on as well.
These lights were not as bright as I would like. If there are other lights on in the house, then these lights don’t stand out as much. However, they are bright enough if the house is dark during a movie.
Pangton Villa Bias Light Strips
![]()
![]()
Pros
- Very inexpensive
- Comes with right angle connectors to make it easy installing behind a TV or monitor
- IR controls makes it compatible with Harmony Hub for smart controls
Cons
- Not extremely bright
On Top of Cabinets
Another light strip idea that looks great and is easy to install is on top of your kitchen cabinets. This adds a lot of impact and makes your ceilings look higher.
For this spot, I tried out an inexpensive smart light strip called Yeelight.
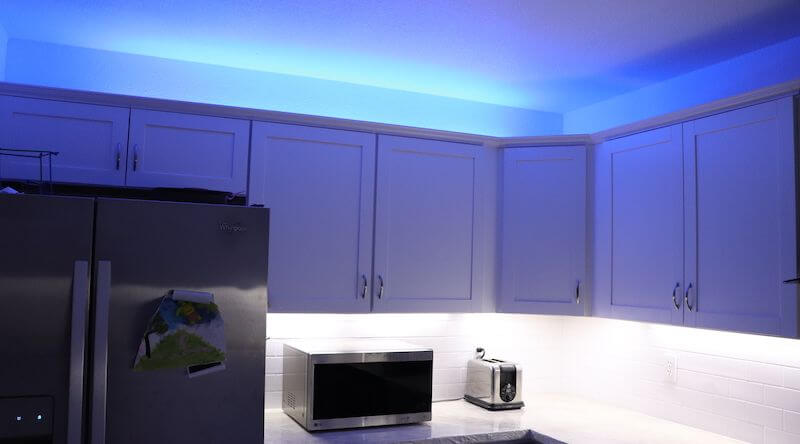 These smart light strips work with Alexa, Google Assistant, and have an app for your iOS or Android phone. You can change the colors and adjust to different kinds of white.

When it comes to smart light strips, Yeelights are one of your cheapest options, with a few drawbacks. You can only select one color at a time and the brightness isn’t the best. It doesn’t get very bright and can’t dim that low either.
Besides those issues, Yeelights worked well and can be automated in the app to turn on and off at a specific time.
Yeelight Smart Light Strips
![]()
![]()
Pros
- Works well with Alexa and Google Assistant
- Scheduling the lights to turn on and off
- Adjust whites and colors in the app
- Inexpensive for smart light strips
Cons
- Not very bright and doesn’t dim low
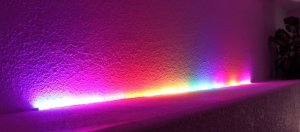
Plant Shelf – Best Smart Light Strips
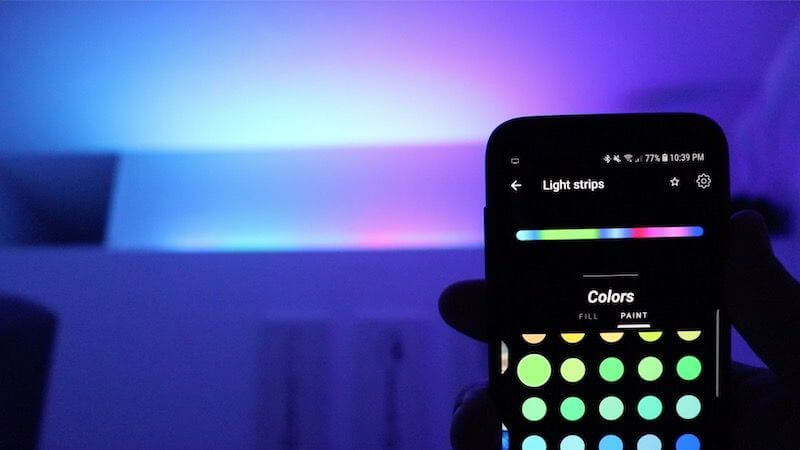
Our favorite smart light strips are LIFX Z. I put these on a plant shelf near the ceiling in the middle of my home because I love showing them off so much.
Philips Hue also has great smart light strips, but there are a few things that push LIFX Z over the edge.
They are extremely bright at 2,800 lumens when extended. The Philips Hue light strips only can reach 1,600 lumens. Checkout LIFX Z vs Hue Light Strips to read more.
The other perks of LIFX over Hue is that each section of the LIFX light strips can change color. The effect is amazing since the light strip can look like a colorful rainbow of different lights. LIFX Z also doesn’t require a hub to connect to your Wi-Fi.
Are you a good painter?
You can pick colors from a pallet on the app and draw the colors onto the LIFX light strips in real time. It’s an awesome thing to try and doesn’t get old because it’s so easy to mix it up every time.
Of course, you can schedule LIFX Z to turn on and off. They work with Alexa, Google Assistant, and so many other smart home devices. This includes SmartThings, HomeKit, Harmony Hub, and Nest.
There are also different themes you can choose from which preselect colors to set different moods. You can integrate the strips with other LIFX smart light bulbs. Read more about the LIFX light strips here.
LIFX Z Light Strips
![]()
![]()
Pros
- Amazing features with painting and themes
- Integrates well with lots of other smart home devices
- The brightest light strips we have seen
- Scheduling the lights to turn on and off
- Adjust whites and colors in the app
- No hub required
Cons
- Expensive compared to the other light strips
Office Desk
Taking a step back into some of the cheaper options, I wanted to show you one of my favorite LED light strip ideas for the office: lights behind my desk.
Not all light strips have to be smart, and I have had some IKEA light strips on my office desk for years. I really like these light strips because they are separated into 4 miniature light strips to install in different spots.
 I have mine behind my monitor and under my desk. They have a little controller that I hid on the side of my desk to easily turn them on and change the color.
As a side note, my desk and monitor arms are both from Fully, which makes awesome standing desks.


Other light strips mentioned in this article could work well on an office desk, too. It’s just easy to put these IKEA lights behind multiple monitors and spread them out.
They do have a lot of wires that can’t be shortened for these light strips to work. It’s not an issue if you use zip ties or something similar to keep the wires from being a mess. Have good wire management!
Pros
- Easy to spread out behind multiple monitors since they come in separate pieces
- Simple controls
Cons
- Not very bright
- Price is slightly high for the length of light strips
Why Light Strips?
Light strips can really transform a room for such little effort.
Whether you add white or multicolor strips, they can make a boring shelf or kitchen cabinets look incredible. Plus they are easy on the eyes since they are subtle lighting.
I love how each of these light strip ideas look in our house and it’s a fun way to mix things up. We will change the colors of our light strips to match holiday colors, sports teams, or just have a dance party with the little one.
I also love having my smart light strips turn on at a certain time in the evening and turn off when I go to bed. It’s just one less thing I have to remember.
Installing Light Strips
One thing I wondered about was how to keep the light strips from falling down. All of these light strips have an adhesive attached to them so all you have to do is peel off the cover and stick them on.
Well, sort of.
When the surface that you are installing isn’t cleaned well, the light strips might eventually fall off. Don’t just wipe off the surface with your hand or a damp washcloth. I’ve done this before because I’m lazy and it doesn’t work well.
Use a cleaner to get all the dirt off the surface and then wipe it down with rubbing alcohol. This will remove dust or anything that will make the light strips lose their stickiness.
When pulling off the cover of the adhesive don’t do it all at once. Just pull off a small portion, like a foot or two, and attach that part. Then pull off more of the cover and repeat. This will help from accidentally have the light strips stick to something they shouldn’t.
Light Strip Length
Cutting and extending light strips is something that is asked all the time. It’s rare for any of these light strip ideas to fit your space perfectly.
All of these light strips can be cut except for LIFX and the IKEA light strips. The light strips behind the TV have connectors so you can change the length without needing to cut.
When extending light strips, make sure you are supplying enough power. You might want to have multiple light strips with their own power sources to make a long light strip. Using smart light strips like LIFX makes this easy since you can control multiple light strips at the same time.
That wraps up our LED light strip ideas to get you started.
Hopefully, this gave you some ideas of what light strips to buy and where to install them. Of course, you can be as creative as you want and do something completely different. If you want to read more take a look at our article on 20 smart lighting ideas.
These light strip ideas are just scratching the surface. Let us know what you have done with light strips in your home by commenting below!
Thanks so much I’m excited get my project.started
Hello;
Thanks for posting your video on LED light strips. This is what I need for my outdoor deck railing. I would like the LED strip to fade very slowly from one pastel color to the next, like blue, red, teal, purple etc. However, I don’t know how fast the fade rate is. I’d like it to be almost imperceptibly slow. I also need about 36 feet in total, preferably cut in the middle.
Can you suggest an outdoor LED strip, with an RF remote, that would work for my application? My outdoor temperatures can swing from -30 F to +90 F.
Any thoughts ? Thank you for any help, Tom.